Showing posts with label Recipe. Show all posts

Wednesday, May 27, 2009

Canning Rhubarb

I have three big clumps of rhubarb growing in my garden. They were there when we moved in. Since we moved in, I have harvested a little, and even got some in the freezer last year, but a lot ended up in the compost heap because it had become so old and overgrown by the time I got to harvesting it. This is not the frugal option!


This year I decided that I really want to preserve as much of my own garden produce as possible and the rhubarb is first! Although it takes time, and a small cost, preserving my own produce is the best way to stock up. After doing some research and some thinking I decided that canning the rhubarb would be the ideal way to preserve it. Canning doesn't take up any room in my freezer, which is only so big. I already own all of the canning equipment, and I was delighted to discover it wouldn't be much more work then to prepare it for the freezer. Because of the high acidity, canned rhubarb only requires a hot water bath to make it safe (not pressure canning, a whole other kettle of fish!)

I love rhubarb, but if you aren't sure about it, try reading this post about a reluctant rhubarb eater who recently discovered how yummy it can be!

In my quest for a canned rhubarb recipe, I started with my favourite food preservation book, Stocking Up. This book is great because they don't use any sugar in their recipes, even in the jams and jellies! As a side note, apple jelly made with honey is the most amazing thing I have ever tasted.

The canned rhubarb has only a little sweetener, and the recipe is very similar to many I found online, replacing the sugar with honey, and reducing the amount of sweetener.

Stocking Up Canned Rhubarb
Wash and trim the rhubarb. Discard all leaves - they are poisonous. Cut into 1/2 inch pieces. Add 1/4 cup of honey to each quart of rhubarb and let stand 3 to 4 hours to draw out the juice. Bring to boiling. Pack hot, with 1/2 inch head space. Process in a hot water bath for 15 minutes for pint or quart size jars.

This turned out well, but it is a little too tart for me to eat straight out of the jar. I will be able to use it in cooking or over something very sweet, like ice cream. I am looking forward to experimenting with this in my cooking. I am imagining it could replace applesauce in many baked goods, like applesauce bread. I am imagining combining it with a variety of fruit to make a lovely fruit crisp in the fall. I suspect with some other fruit (maybe strawberries?) it would make a great pie filling too! I will post recipes results as I try them.
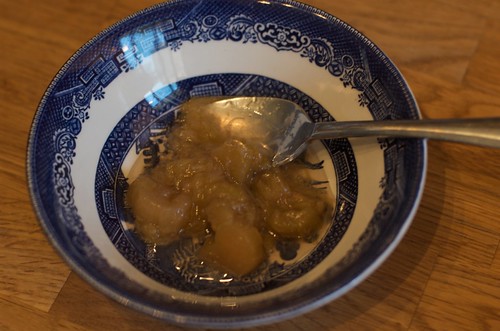

I decided what I really want is a rhubarb sauce. Something just a little sweeter that the first canned rhubarb. Something that I could use over pancakes or plain yogurt, straight from the jar. Something like a tart and runny rhubarb jam.

I decided to try doubling the honey in the original Stocking Up recipe. I am very careful about mucking around with canning recipes. There are potential risks in canning, and you don't want to mess around. As I already know that most jams are safe to can, I decided that adding extra sweetener should not alter the food safety. In fact, as I understand it, the sugars add to the food safety, making it harder for bacteria to grow. More importantly, the acidity of the rhubarb is what makes hot water canning safe, and sugar alters the flavour, but not the acidity. Also, the other canning recipes I found used more sugar than I had used honey! (I can't find anything on the web or in a book to back me up. Does anyone have any information?)

Meredith's Simple Rhubarb Sauce
Wash and trim the rhubarb. Don't forget to discard the poisonous leaves. Cut into 1/2 inch pieces.

For each quart (4 cups or 1 liter) of rhubarb, add 1/2 cup of honey. Let it sit 3 to 4 hours, then bring it to a boil.


Fill clean, hot jars leaving 1/2 inch of head space. Process for 15 minutes in a boiling water bath.


If you have hard water, don't be afraid of the white powder all over your jars when they come out of the canner. When they are cool and sealed, you can wipe it off with a damp cloth.


The result is still tart, but sweet enough that I can eat it straight out of the jar. I am looking forward to trying it over pancakes. Yum! I think I could use it as a substitute for the first three ingredients in these rhubarb upside down muffins, although I haven't had a chance to try it yet.

Keep in mind that my recipe is not a "tested" recipe, but I can't see any reason why it shouldn't be as safe as any other home canned produce. I am going to store it in my cold cellar and enjoy it all winter. I should get another harvest of rhubarb, and I will make some more. Yum!

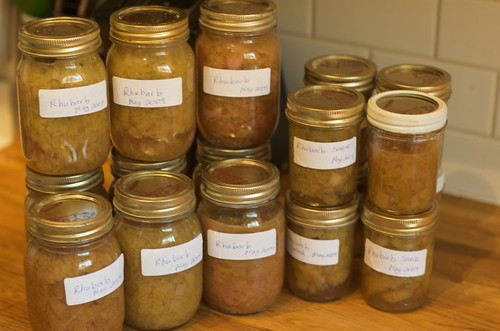
A note about quantities: I made three different batches, two of the Stocking Up canned rhubarb and one of my own rhubarb sauce. When I used 3 quarts of rhubarb, I got 4 pint jars of canned rhubarb. When I used 4 quarts of rhubarb, I got 5 and 1/2 pint jars of canned rhubarb. I used 4 quarts of rhubarb to make my sauce, and ended up with 8 half pint jars, or 4 pints total.

How much rhubarb makes up a quart? Well, I weighed several of my quarts, and got different weights each time. The average weight was 524 g or just over a pound.

For more ideas on what to do with fresh rhubarb, visit Tammy's Recipes.

Monday, May 11, 2009

Quick and Easy Europe's Best Stir Fry


If anyone was wondering why I am so excited about the sale on Europe's Best vegetables this week, it is because of their Zen Garden vegetables. I paid only $0.99 for 600 grams of frozen veggies. The ingredient list is simply and delicious:

Snow peas
Yellow carrots
Orange carrots
Water chestnuts
Red pepper
Baby corn
Bean sprouts

For a quick meal, combine the frozen vegetables with some cooked protein (leftover chicken, pork or beef are all nice) in a hot pan. I used leftover popcorn chicken this time. Cover for 3-5 minutes, so the veggies can thaw. Take off the lid and continue to cook while stirring until it is hot, another few minutes. Throw in some kind of Asian sauce. I like Hoisin sauce. Add a little soy sauce if you need more seasoning.
For a complete meal serve with rice!

One word of caution here, if you are into the 100 mile diet or worried about food from China, you might want to avoid Europe's Best vegetables. These ones are a product of China. For me, at this point, it is worth it! You will have to make your own choice, but I felt I should offer full disclosure in my review!


Also, I wonder if I should consider adding Hoisin sauce to my homemade convenience challenge?

Wednesday, May 6, 2009

Homemade Soft Drink Replacements

My little epiphany regarding convenience foods compared to making things from scratch, and my goal to make some changes and share them with the world was challenged this morning. I remembered I have guests coming tonight and no pop in the house. Not only that, I haven't had anything to serve my guests for the past 3 or 4 weeks, and I am starting to feel like a very lousy hostess!

I could probably find pop on sale somewhere, but that would compromise my $100 challenge. Not only that, but my husband and I are trying to keep pop out of the house for our own health. I tried keeping it around just for guests, but the only success I had was when I bought only root beer, because I hate root beer... but it turns out most of my guests agree with me.

My husband made homemade ginger ale a few weeks ago, following Alton Brown's recipe. He enjoyed it, and will probably make it again. I wasn't particularly impressed with the flavour, and it takes 48 hours to make, so it isn't an option for tonight.

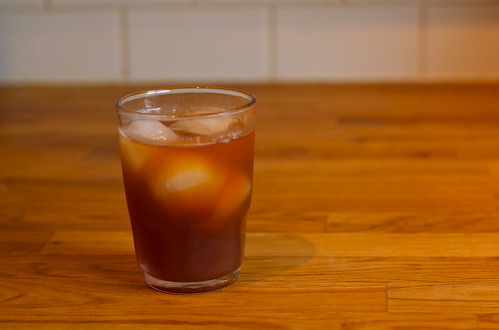
I found a great solution that I have used before and been very happy with. A lovely cold beverage without too many calories, which can be made easily and quickly and costs very little - Iced Tea!

Recipe


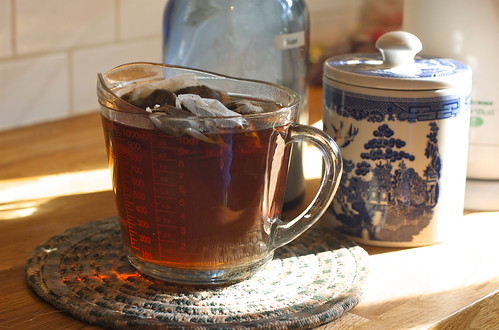
I use the Hillbilly Housewife's Iced Tea recipe for perfect iced tea every time. It is a great, easy recipe I have used before. I made it with 1/4 cup of sugar, but follow her advice and sweeten it to taste.

Price

On her site, she says she makes the entire batch (8 quarts or 2 liters) for only $0.08. I will have to keep an eye out for cheaper tea bags. My batch cost $0.22 for the tea bags, bought last week on sale and $0.03 for 1/4 cup of sugar for a grand total of $0.25 for 2 liters of beverage.

A two liter bottle of no name pop usually costs about $1. I think I have seen it for as little as $0.75. If I am being generous with the price of pop, my homemade alternative still cost only a third of the price of store bought soda. I saved at least $0.50, and given that I was going to go out and buy some pop at full price I saved more than $0.75 easily.

Over a year, if my family drinks 4 liters a week, I am saving at least $52.00. If you drink more pop, your savings could be even greater!

(Please don't remind me that it we just drank the water straight we would save at least $26 more!)

Convenience

Today, my homemade alternative was more convenient than store bought because I didn't have to make an extra run to the store with two small children in tow.

It took about 15 minutes of my time, from start to finish to make the tea, and then some time to cool, although the recipe suggests serving it immediately over ice too. Most of the "cooking" time is waiting for the tea to steep, which is hardly labour intensive.

Sure, it is a little more work than opening a bottle, but the effort is minimal, and worth it when you compare taste!

Flavour

I love homemade iced tea. It feels like a special treat and I am proud to serve it to guests. You can adjust the sweetness to taste and experiment with different flavours of tea bags to make all sorts of new beverages. Homemade beats store bought for flavour, hands down.

Environmental Impact

I made my tea in a reusable drink pitcher I will use over and over again, rather than buying it in 2 liter plastic bottles or aluminum cans. We would recycle these things, or possibly even reuse them, but on the waste hierarchy, reduce is the best option, which is what I am doing by not purchasing the bottles.

Sure, I had to turn on the kettle, and I use my refrigerator to cool the tea down, but I am certain that the energy the transport trucks use to tote all those bottles of pop around far exceeds my small usage.

Ingredients

It probably isn't entirely fair to compare store bought soda pop ingredients with homemade iced tea ingredients, but I don't have an empty iced tea bottle at home, and I do have an empty Diet Coke bottle at home!

The Diet Coke contains carbonated water, caramel colour, phosphoric and citric acid, aspartame (contains phenylalanin), flavour, sodium benzoate, caffeine, acesulfame-potassium. Aspartame and acesulfame-potassium are are only there because it is a diet drink. The regular Coke is probably made with high fructose corn syrup, which is full of its own perils. Interesting side note for my fellow Canadians: did you know that the glucose-fructose you see on food labels seems to be the same as the infamous high fructose corn syrup?

If there are 17 teaspoons of sugar in 20 oz of pop, there is over 1 cup of sugar in 2 liters of pop. My 1/4 cup of sugar is starting to look very healthy! If I decided to use honey instead, I could steer clear entirely of white sugar.

There is also some evidence that tea may be a healthy choice of beverages, while I haven't seen any new studies on the health benefits of soda pop!

I won't let my kids drink the iced tea, just as I won't let them drink Coke or coffee or hot tea or any other high caffeine beverage, but I think that homemade iced tea will permanently replace the store bought convenience of soda pop at our house. If nothing else, the way your guests eyes light up when you offer them homemade iced tea makes it worthwhile!

Price of Store Bought Vs. Homemade

I just read a great article comparing the price of store bought and homemade food. She compares bagels, cream cheese, jam, crackers and granola, and overall, homemade comes out cheaper and better tasting. The author seemed a little surprised, but I'm not! I guess I grew up with a bit of a homemade bias. Cakes were always from scratch, and bread always came out of the bread machine. And I just always assumed that homemade was both better tasting, better for you and cheaper. Over at Home Ec 101, Heather agrees with me, but reinforced the idea that saving money isn't the only goal of making food from scratch.

Some of my assumptions were turned on their head when I read the Hillbilly Housewife's article about "convenience" foods that are worth purchasing rather than making at home. Pasta, frozen veggies and canned beans all make her list of convenience foods. She is right, of course - they are a convenience food compared to what my great grandmother would have used, never mind the fancy stand mixer, the food processor, the rice cooker and the bread machine I have in my kitchen. Go back just a little further, and even my stove starts to look like a convenience item!

All of this got me thinking about my own food assumptions and bias. On this adventure to feed my family on a budget, my goal is to make sure we are eating a healthy diet and that we are being mindful of our environmental impact. Additionally, the taste and flavours of the food we are eating has to be at the top of my agenda, if I want anyone to eat it!

With this in mind, I am going to try doing some comparisons of the prices, flavours, ingredient lists and environmental impact of some foods I already make from scratch as well as some of my favourite convenience foods.

My Comparisons (A Growing List)

A Soft Drink Replacement (Iced Tea)

Wednesday, April 22, 2009

Pasta Carbonara


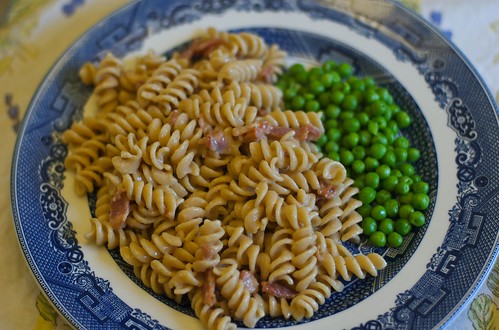
Pasta Carbonara, or Italian eggs and bacon, as we called it when I was a kid, is a fast, easy and delicious meal. It is my fall back when I don't know what to make and need supper right away. I almost always have the ingredients on hand and the longest part of the cooking is bringing the pasta water to a boil.

Ingredients
1/2 package of bacon (250 g or 1/2 lb) (we always have bacon in the freezer - cook from frozen!)
Big handful of grated Parmesan cheese (about 30 g or 1 oz) (also kept in the freezer)
2 eggs
1/2 cup milk (or a little less)
freshly grated nutmeg (about 1/4 tsp) (our secret ingredient!)
salt and pepper
375 g of whole wheat pasta (or you could use regular, or course.)

Put a big pot of water on to boil for the pasta. Cook the pasta according to package directions.

Cut the bacon into strips, and fry until it is cooked. I keep my bacon in the freezer, and use a big sharp knife or my clever to cut the bacon into strips. I throw it into the hot pan still frozen.

While the bacon is cooking, grate your cheese.

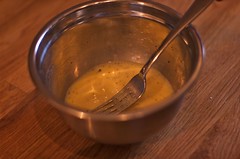
Then combine the eggs, milk, nutmeg, salt and pepper in a small bowl.

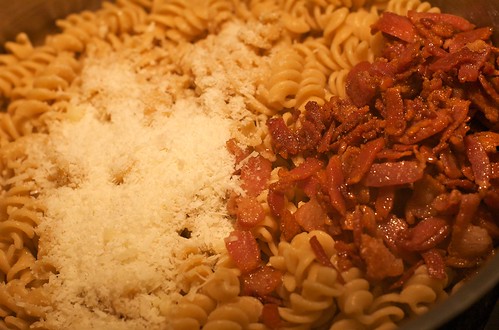
When the pasta is cooked, drain it and put it back in the pot. Add the cooked bacon and the cheese.


Pour the egg mixture over the hot pasta and stir well. The heat of the pasta will cook the egg, making everything shiny and lovely looking. There should be little to no egg mixture on the bottom of the pot.


Serve right away, while it is hot and delicious.


This should serve 4 adults, but it is very very good and we never have leftovers. Ever.

Tuesday, April 21, 2009

Cornmeal Muffins


Before I start, keep in mind that I am Canadian, and cornbread is not part of my heritage! We started eating cornbread when we were briefly living in North Carolina, and I made my own version when I moved back home.

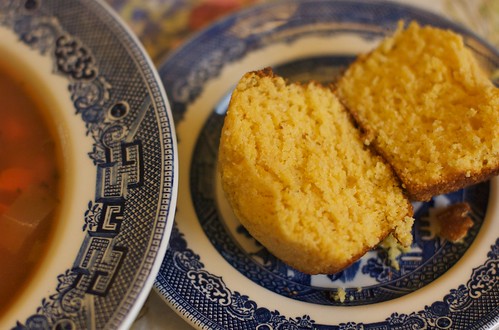
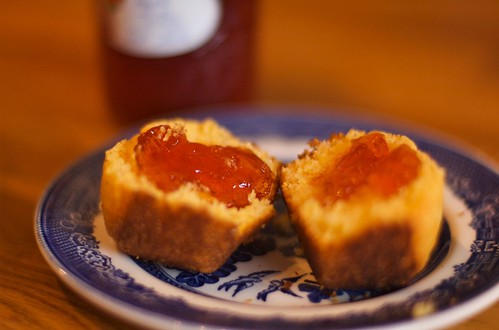
This recipe makes a sweeter cornbread, made as muffins, because we like muffins. They are great as a side to chili, or ribs or anything else that might qualify as southern or Tex-Mex! They are also delicious spread with jam for breakfast or a snack.

Ingredients
1 cup cornmeal
1 cup all purpose or whole wheat flour
1/2 cup white sugar
3 teaspoons baking powder
1/2 teaspoon salt
1 cup milk
1 egg
4 tablespoons oil

Combine the cornmeal, flour, sugar, baking powder and salt. In a separate bowl, combine the milk, egg and oil. Beat lightly to break the egg and combine. Add the wet ingredients to the dry ingredients. Stir very gently, just to combine.


Pour into a greased 12 cup muffin tin. Bake at 425F for 10-15 minutes, until the muffins spring back.


Serve warm or cold or any way you like! Yummy!

Thursday, April 16, 2009

Movenpick Inspired Yogurt Muesli


When I was a child, we used to go to the Movenpick restaurant in Toronto for brunch. My favourite thing to eat was their muesli. I have created my own version based on this childhood treat, for a healthy and delicious breakfast, made in advanced for a fast morning meal.

This version is different from every muesli recipe I could find on the Internet because it is not a dry cereal, but a wet, yogurt-based muesli. Imagine a dry oat based cereal combined with yogurt and fruit and left overnight for the flavours to meld and the oats to become soft, almost like a cooked oatmeal. The red berries give it a lovely pink colour.

You need to make this at least the night before, because it has to sit in your fridge for the oats and seeds to soak in the yogurt, and the flavours to meld. If you make extra, it is even better then next day.

I have been reading up on the advantages of soakings grains and I think this recipe could be easily adapted to soaking. Soaked grains are not refrigerated during the soaking period, and oats should be soaked for 24 hours. I have included my suggestion for soaking directions at the bottom, but I haven't tried this method yet. I will update when I try this next week.

This muesli is very filling and you won't need much. It also makes a great snack, or even desert.

Ingredients:
1 whole apple, a sweeter variety (I often use Empires)
1 1/4 cups yogurt (375 g)
about 1/8 cup honey
1/2 cup rolled oats
1/4 cup sunflower seeds
1/8 cup sesame seeds
1/8 cup raisins
1 cup frozen mixed berries

Grate the apple into a large bowl. I keep the peel on. Combine with the yogurt and honey. You want to make the yogurt sweet enough for your family's taste, using the apple and the honey. Keep in mind that their will be added raisins, which are very sweet!

Add the rolled oats, the seeds, the raisins and the frozen berries.

Put into a covered container to store. It should sit in the fridge at least 8 hours.

Makes about 3 cups, which can easily serve 4 for breakfast.

The recipe is very flexible. You can exchange the seeds for any other type of seed or nut, the raisins are optional, and the berries can be of any sort you like.

Recipe Cost: about $2.75 for 4 servings, or $0.69 per serving.

Suggestion towards a soaked method:
The morning before you want to eat the muesli, combine the oats and seeds and enough yogurt to make it moist. Cover and leave on the counter for 24 hours.

That same evening, combine the grated apple, the rest of the yogurt, and honey to your ideal sweetness. Add the raisins and frozen fruit. Keep in the fridge overnight. This will allow the raisins to plump up, the fruit to defrost, and the sweetness to melt with the yogurt.

In the morning, combine the soaked oats with the refrigerated fruit/yogurt mixture, and enjoy.

I am including this in The Nourishing Gourmet's Breakfast recipe carnival.

Wednesday, April 15, 2009

Cheap and Easy Cheese Crackers


HevenlyHomemakers.com just posted a recipe for crispy cheese crackers. She suggested they would be a great alternative to Goldfish crackers. Now, my kids LOVE those little fish, but I hardly ever buy them. They seem overpriced, and I have a bad habit of eating them all when the kids aren't looking!

I spent $1.74 for a package of whole grain fish a few months ago, because they were on sale for $2.49 and I had a coupon for $0.75 off. The entire package weighed 180g. That means I paid $0.97 per 100 grams.

This dough for this recipe took the time it takes to preheat the oven to throw together, 15 minutes to bake and another 15 -30 minutes with the oven turned off to crisp up.

The most expensive part of this recipe was the cheese, which cost me about $0.63. All together, this recipe cost me $1.25, given that all ingredients were purchased using my stocking up method. The final weight of the crackers was 280g. That means these crackers cost $0.43 per 100 grams.

So for less than half the price, I have a quick, easy, homemade cracker, made with 100% whole wheat flour. And the kids love them!

Monday, April 13, 2009

Easter Meal

For Easter this year, we had a Greek themed dinner. We doubled the number of people we were having to dinner at the last minute, so we had to add some extra meat to the lamb we had planned.

Our Easter Menu:
The meal was a great success!

Friday, April 10, 2009

Hot Cross Buns


Yesterday after supper I decided to make hot cross buns. I know they are traditional for Good Friday, but I had never made them before.

A quick search online turned up a recipe by Anna Olson of TV's Sugar. I have seen her show, and was confident that her recipe would be tasty. Additionally, the recipe looked easy, and I had all of the ingredients on hand! I left out the candied cherries and candied pineapples, feeling that I would stick with just the raisins and candied peel, which seem more traditional.

If you have a large stand mixer, these are a snap to make!

Ingredients

For the Buns
1 1/2 cups milk, at room temperature
1/2 cup sugar
1 tbsp instant dry active yeast
1 large egg
1 tbsp cinnamon
1/2 tsp ground nutmeg
1/4 tsp ground cloves
1/4 tsp ground allspice
1 tsp salt
4 1/2 cups all purpose flour
3 tbsp unsalted butter, melted
1 cup raisins
1/2 cup diced candied orange peel

In a mixer fitted with a dough hook, combine the yeast, sugar and milk. Make sure the milk isn't cold form the fridge, as this may cause problems for the yeast.
Stir in the eggs.
Add the spices, salt, flour and melted butter.
Once the ingredients are combined, add the raisins and candied peel.

With the mixer, kneed on low speed for 5 minutes. Keep an eye on it, as the dough wanted to climb up the dough hook. Alternatively, according to Anna, you can mix by hand with a wooden spoon for 8 minutes.... I would think that you would actually need to kneed the dough for most of this time, not just stir it!

Butter the mixing bowl, and return the dough to the bowl. Cover with a tea towel, leave in a warm place and allow the dough to rise for 1 hour.

When the dough has risen, turn it out onto a lightly floured surface, and divide it into 12 small pieces. I made sure to punch down the dough, removing the air during this procedure, as that is the normal practice in yeast breads. Grease a 10" spring form pan, and put the 12 smooth balls into the pan. I am sure you could use a square pan, or even put them out on a cookie sheet if you wanted buns that were not attached. The spring form pan works well, because after they are baked you will apply a glaze to the hot buns.

Cover the buns with a tea towel and let rise another 20 minutes.

Place in a 350F oven and bake for 35 minutes, until the buns are dark brown.

I was disappointed by how dry the buns looked when they came out of the oven. But I had forgotten about the glaze.

For the glaze
1/2 cup sugar
1/4 cup water

While you are waiting to take the buns out of the oven, combine the sugar and water in a pot. Cook until the sugar is dissolved, but not browned.
When you take the buns out of the oven, poke holes in them. I used my cake tester. A toothpick would also work well.
Brush the glaze over the top of the buns. Even though it seemed like too much, we ended up pouring all of the glaze over the buns, and I'm glad we did.

We left our buns to sit overnight, and soak up all of the glaze.
This morning, my husband made the icing, and applied nice white crosses to the tops of the buns, using a piping bag.

For the icing:
1 1/2 cups icing sugar
2 tbsp milk

I think that Anna Olson intended to frost the entire bun, like a cinnamon roll, rather than just put crosses on them, judging by the amount of icing she made. I don't think that the extra icing was necessary - they would be too sweet. To avoid the icing all together, you could make a white dough of flour and water to apply to the uncooked buns, as Anna also suggested. I think I will try that next time.

The buns ended up soft with a chewy texture, and slightly sticky because of the glaze. We all loved them and decided this recipe is a keeper.


Enjoy!

Monday, April 6, 2009

Rosemary Garlic Pork Tenderloin

This is a great quick weeknight meal, but also my go-to meal if I have guests. Everyone loves it, but it is fast and easy.

This makes 4 servings, but is very easy to double because the sale pork tenderloins are usually two to a package. Wait for a sale. I expect to pay less than $3 per pound.

1 Pork Tenderloin (about 500 g or 1 lb)
2 tbsp olive oil
2 cloves garlic
2 tbsp dried rosemary
salt and pepper

Preheat the oven to 475F.

Heat a large, ovenproof frying pan over high heat. I use my large cast iron skillet. Add salt and pepper to the pork and place in the frying pan to brown. As each side browns, turn over. This will take about 5 to 8 minutes.

While the pork is browning, chop, press or grate the garlic. Roughly chop the rosemary, to get rid of any large pieces. Combine the garlic, rosemary and olive oil.

When the meat is brown, spread the oil mixture over all sides of the pork. Place the meat in the hot oven and cook about 10 more minutes, until it reaches an internal temperature of 145F. The meat should have just a hint of pink. The meat should rest before cutting.

Health Canada and the USDA both say that pork should be cooked to 160F to be safe. I am generally big on food safety, but you want to be really careful not to over cook the pork. It doesn't have a lot of fat and if you overcook it it will be dry. To follow the safety guidelines I would consider taking the meat out of the oven at 150F and tenting it with tinfoil for 10 to 15 minutes before cutting the meat. That should be enough to bring it up to the required 160F. The consensus seems to be that meat will go up from 5 to 10 degrees while it rests.